I just spent the last two hours assembling the lining for the
Pinkerton vest. It shouldn't take quite that long, but taking the time to photograph each step takes up a certain amount of time. I have to move the table towards the machines and drag the chair to the west side of the room for each photograph of the full tabletop.
 |
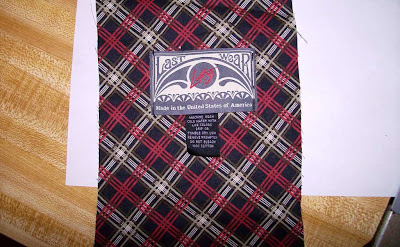
| The lining parts all laid out, including the Lastwear tags. |
The process is pretty much exactly like sewing the shell, except that you also have to stitch all those little fiddly bits of facing onto the lining pieces. And instead of welt pockets, I had tags to sew in. (That's one of the nice things about sewing for a company -
Lastwear provided everything including their very nice ribbon tags.)
(More behind the cut!)
I discovered that my sewing machine does NOT like to stitch through the tags. I solved the problem by inserting a layer of my favorite tear-away stabilizer, more commonly known as a sheet of typing paper. (If I'm doing something where I won't be able to remove all of the stabilizer, I usually use a cut-away stabilizer; Sulky makes a nice one that's readily available at your favorite fabric store.)
 |
| The tags are placed on the left front, which is the right-hand most piece of lining. Confusing, I know, but this will be the inside of the garment. |
Next, I did all the vertical seams. I use hardly any pins when I sew, but I did pin each facing piece to its lining piece so that they'd stay together. I stacked the pieces up and put them in my lap, and fed them through the machine in a chain.
 |
| These pieces are still connected by the thread. |
I then separated the parts and stitched up the vertical seams. The seams are pressed in the opposite direction as on the shell to reduce bulk when the garment is assembled; I did take a moment to press the seam allowances and clip the seams above the armhole, where the curve is the greatest.
 |
| The vertical seams are sewn. |
 |
| After topstitching. |
Finally, the shoulder seams are sewn and topstitched, again in the opposite direction from the shell - here, towards the front.
 |
| The completed lining, from the back. |
 |
| Front of the completed lining. |
I was asked what I like to do when breaking from my projects. I do use the Pomodoro technique, so on short breaks usually I stretch, get some water, use the restroom. On long break, I usually make tea and play with the kitties.
 |
| Chichi hates having his picture taken, but loves to hang out in the sewing room. |
 |
| Hot tea and Facebook. |


Chain-piecing, just like you would when quilting! Of course! Genius. I sew and quilt but I wouldn't have thought to do this.
ReplyDeleteThanks so much for going to the bother of taking the photographs, wonderfully helpful. I appreciate seeing how big the inner green piece is, I keep thinking it's the wrong fabric when I read through the pattern or start to cut.
Very good point about the seam allowances getting pressed the opposite way of the outer.
I have a question on the stabilizer/typing paper, but I'll ask that on Google+ if you don't mind.
I love your tea cup, it is so pretty!
I haven't ever quilted - I use chaining as it might be done in the factory.
ReplyDeleteI've answered your stabilizer question on G+ but do feel free to ask any question you have here. If you're asking, someone else will be too.
The tea cup originally belonged to a friend of my Grandmother's. It's not expensive or particularly valuable, but it *is* pretty! When Grandma passed, it wound up at my mom's house. She thought I was daft when I asked if I could have it. She asked, "Whatever do you want it for?" Why, for drinking tea, of course!